Showing posts with label Striping Foil. Show all posts
Monday, 30 December 2013
CND Shellac Christmas Nail Art - #10 The Reinvented French
And it's the last Christmas manicure of the season. Simple yet effective with a reinvented french manicure for Jene. She opted for a simple clear, nude base and two suitably festive colours on her tips.
I used one coat of Negligee for the base colour (after base coat) and then with a bit of striping tape help, I created a diagonal along one edge with Sugared Spice. Make sure you remove the tape before curing! I did three coats of the Sugared Spice in the end - the second two coats I did freehand once the tape had given me a nice clean edge to work from. I then repeated the process, three coats, in Tinted Love on the other side of each nail. As you can see in the top photo, I alternated the colours on each hand - like a mirror image.
Subtly Christmassy don't you think? Next up is New Year's nails.... oh how 2013 has flown by!
Disclaimer - I purchased all the products used for this manicure myself, and if you want more info about myself and CND Shellac then check out my disclaimer page here. What's not to like about nail art that actually lasts?!
Friday, 26 July 2013
CND Shellac Nail Art - Nautical Nails
Aye aye Cap'n! You may have spotted me donning a rather nautical themed outfit and hat a couple of weeks back on my instagram. They were in aid of my friend Rachel's nautical themed hen party, ahead of her impending nuptials at the end of August.
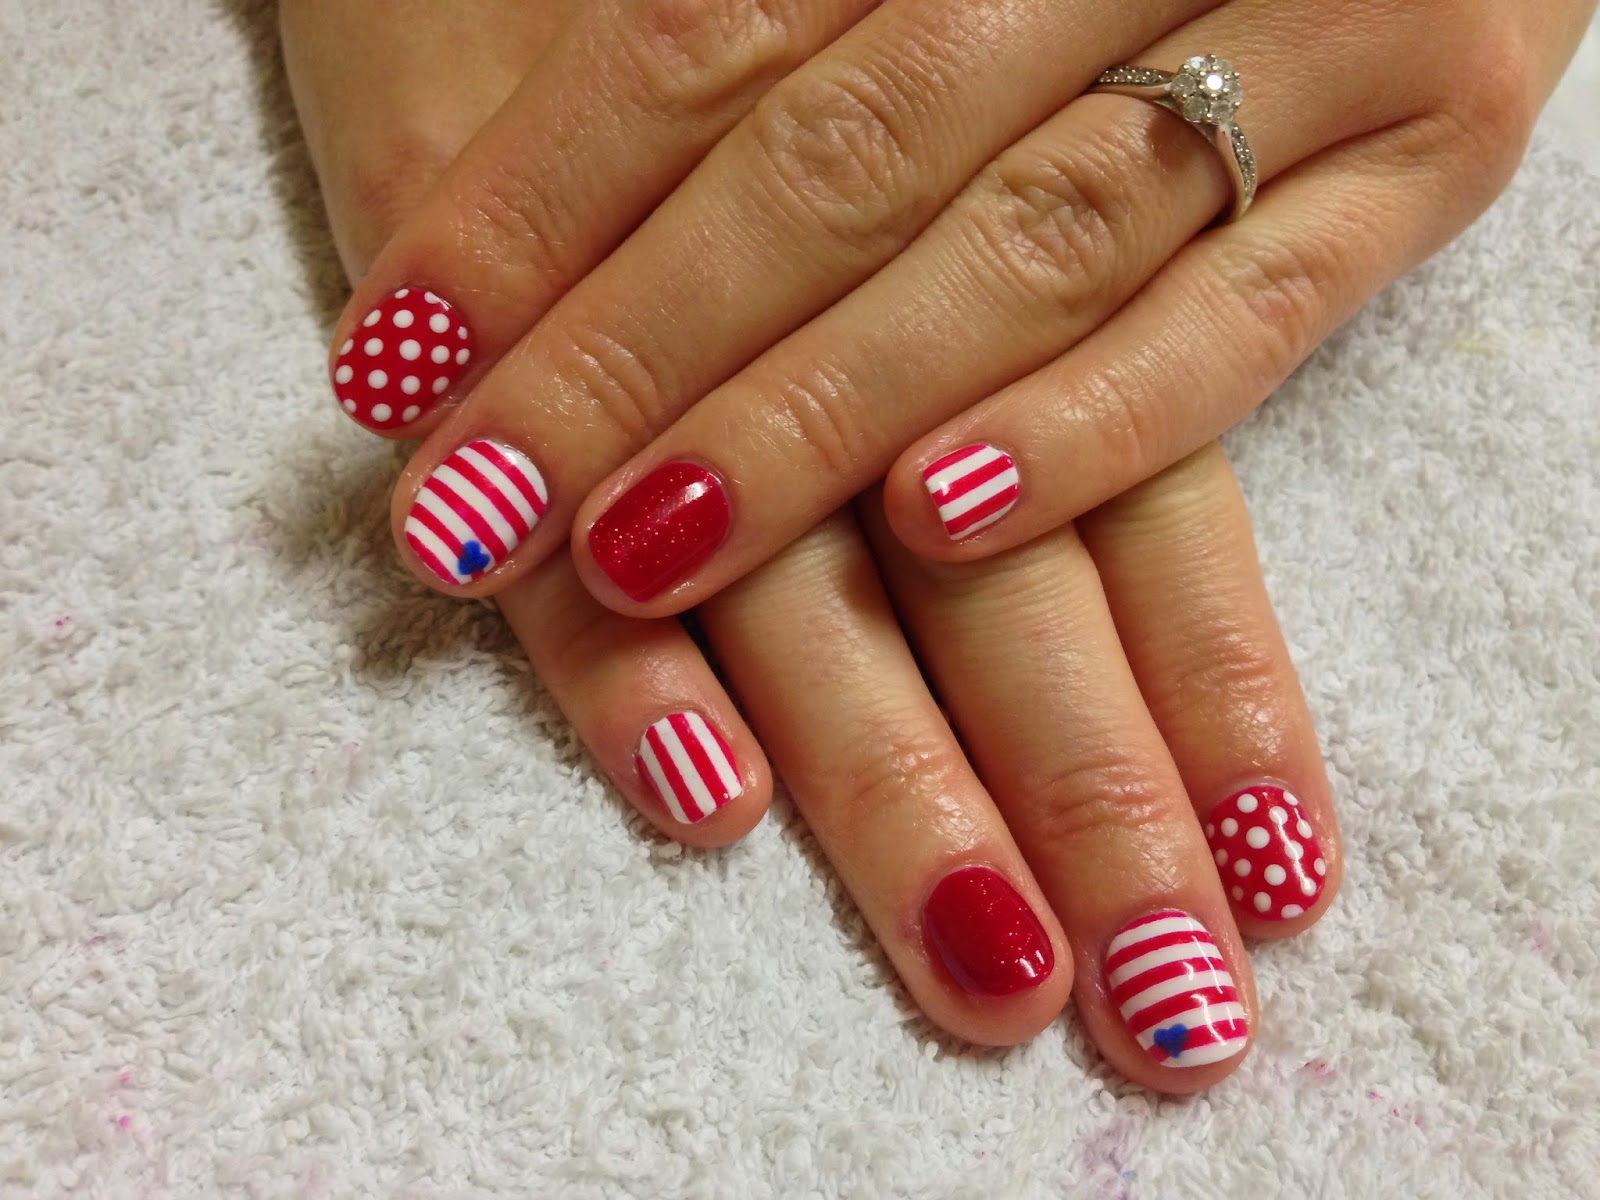
So of course for the hen's nails, she needed something truly appropriate to the theme. And not just one design, she went all out with a mix'n'match red and white theme.
The colours I used to create this were Hollywood, Ruby Ritz, Cream Puff and Water Park.
It's probably easiest if I breakdown what I did on each nail individually:
Thumb - Hollywood with two 1.5mm round gold studs (from eBay)
Index - Hollywood base with Cream Puff polka dots
Middle - Cream Puff base, horizontal stripes in Hollywood and a blue heart in Water Park
Ring - Hollywood base with Ruby Ritz over the top
Little - Cream Puff base and vertical stripes in Hollywood
To create the stripes I cheated a little and used some striping tape (from eBay) as a stencil and the polka dots were just done with a small dotting tool. The heart was free handed using my dotting tool and a small detailer brush.
What do you think?
Disclaimer
- All products used for this manicure were bought myself, for more info
about myself and CND Shellac please check out my disclaimer page here. Once you Shellac you never go back!
Monday, 21 January 2013
CND Shellac Nail Art - Rock Royalty and a Gold Stripe
What better way to finish off a snow day absent from school, than to catch up on more nail posts? Trust me, this is only the tip of the iceberg.... I have so many to show you!
This is Amy, you've not seen her before as she's a typical French-y type of gal but for our Greek Holiday back in September she'd seen this look on instagram somewhere and wanted it replicated in Shellac. We went for Rock Royalty and tipped it off with some gold foil striping tape (I got a pack of 10 colours for like £1.99 on eBay a while back - try similar ones here).
She loved it and it lasted well - I was initially concerned that the striping foil may pick up at the edges but as a tip, I recommend you cut the striping tape about 1mm short of the edge of the nail. By doing this the top coat covers it from end to end and you avoid any lifting later on.
Disclaimer - All products used for this manicure were bought myself, for more info about myself and CND Shellac please check out my disclaimer page here. I might not be a professional, but I sure love me some Shellac nail art :)
Saturday, 24 November 2012
CND Shellac Nail Art - Super Chevrons
Following my first trial with striping tape and Shellac - here - I was keen to try it out again with other designs. So of course in steps Stacey, offering me a blank canvas for a little experimentation - we called this one "Super Chevrons"...
Inspiration came from Jane at nailside.blogspot.co.uk - her designs are always so neat and striking and especially brilliant to recreate in Shellac. In particular we liked the look of her South Africa? post but changed the colours up a little bit.
I started of with two white coats (cured between each) of Cream Puff as a base colour. I then added a vertical strip of the beautiful blood-red Decadence to the left half of each nail. After curing the red, I added two strips of thin striping tape to each nail, in a chevron style, near the tip. I mixed some Gosh Nail Glitter in Gold with some Shellac Mother of Pearl to make a glitter paste and painted it into the chevron 'V' area. I removed the striping tape and cured the glitter tip. To create the blue accent, I mixed some of my Cerulean Blue Additive with Cream Puff and painted a border along the 'V' edge of the chevrons, with a small detailer brush, and cured. I sealed it all in with top coat and then Stacey decided to add some studs to her ring fingers as a little extra. So I pressed those into the tacky layer of the top coat and added another coat, before curing for the last time.
And there you have it, Super Chevron nails, 'super' because there's just something very superhero about them don't you think?
Disclaimer - All products used for this manicure were bought myself, for more info about myself and CND Shellac please check out my disclaimer page here. I might not be a professional, but I sure love me some Shellac nail art :)
Saturday, 27 October 2012
CND Shellac Nail Art - Gotcha & Silver Glitter Chevrons
Ah, here's another one from the archives.... this was an experiment I tried out on myself after I was bored of the silver glitter tips and I think it turned out really well.
I'd just ordered a couple of new Shellac colours and decided to try out the Gotcha. I was trawling through my instagram 'likes' to find some inspiration when I came across one of Michelles Poena's designs I thought I'd try (find Michelle's blog here - http://michelleinwonderland-michelle.blogspot.co.uk/ and on instagram - @michellepoena).
I painted all my nails (bar the ring finger) with Gotcha then mixed up a silver glitter paste with Mother of Pearl and some Gosh nail glitter in silver, and I painted that on as an accent nail. The first coat was cured for 120 seconds and then I added a second, curing for 120 seconds, on all nails. I used some striping tape to tape off the triangular area on my Gotcha nails and then used the glitter paste to fill in the chevrons. After curing the glitter detail for 120 seconds, I added the small diamantés to the tips of the triangles and topped it off with top coat to seal it all in.
A little barbie-ish but I like it all the same :) What do you think?
Disclaimer - All products used for this manicure were bought myself, for more info about myself and CND Shellac please check out my disclaimer page here. I might not be a professional, but I sure love me some Shellac nail art :)
Thursday, 16 February 2012
CND Shellac Nail Art - Shellac Layering, Diamanté & Striping Foil
Wow, another one I'd forgotten about. Today seems to be the day for long lost manicures!
This is one that I did on my other sister about 2-3 months ago. She fell in love with Shellac Iced Coral when I bought it and opted to layer it with Studio White to make it a more solid colour. Oh, and I then went nail art crazy on her ring finger to make it more interesting!
After prepping the nails and applying the base coat (and curing for 10 seconds) I applied one coat of Studio White and cured for 120 seconds, then one coat of Iced Coral over the top and cured for 120 seconds. Then I placed two strips of gold striping foil diagonally across the ring fingers and some diamantés diagonally too, in the sticky layer. I finished by applying top coat and cured for 120 sec. Voila!
What do you think? Let me know your thoughts.
This is one that I did on my other sister about 2-3 months ago. She fell in love with Shellac Iced Coral when I bought it and opted to layer it with Studio White to make it a more solid colour. Oh, and I then went nail art crazy on her ring finger to make it more interesting!
After prepping the nails and applying the base coat (and curing for 10 seconds) I applied one coat of Studio White and cured for 120 seconds, then one coat of Iced Coral over the top and cured for 120 seconds. Then I placed two strips of gold striping foil diagonally across the ring fingers and some diamantés diagonally too, in the sticky layer. I finished by applying top coat and cured for 120 sec. Voila!
What do you think? Let me know your thoughts.
Monday, 13 February 2012
CND Shellac Blackpool with Glitter Tips & Foil Nail Art
Nat's friend Stacey called me back for CND Shellac manicure again today - she had the Red Baroness (see this post) a little while back and more recently, a french manicure, and as you can see, her nails have really grown.
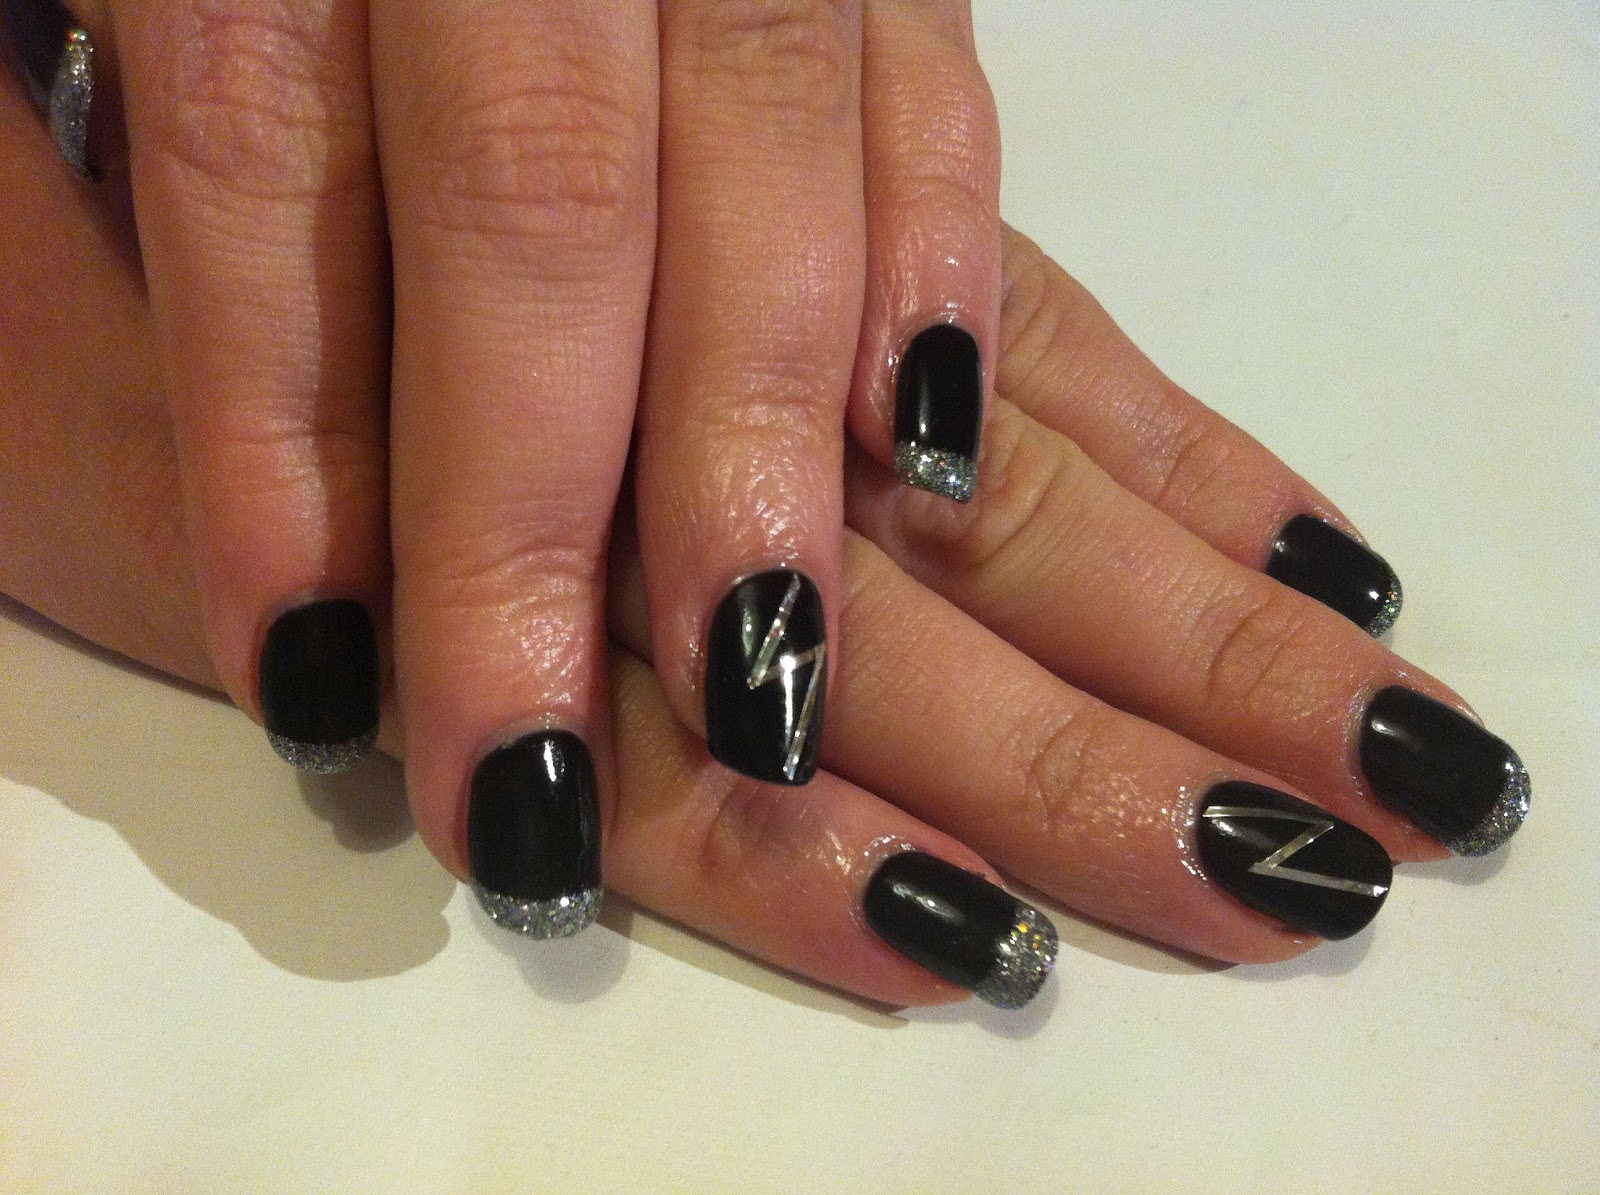
So this time she opted for something very different and chose to have Shellac in Blackpool. She really liked my manicure that I had with Blackpool and the diamante lightening bolt (see this post), so we updated it with some silver glitter tips and a lightning bolt in foil instead.
To create this look I prepped the nails as CND recommend - cuticle tidy, file, scrubfresh and then applied Shellac base coat (curing for 10secs). I followed this with 2 coats of Shellac in Blackpool (curing for 120secs after each coat). To make the glitter tips I first mixed some Gosh Nail Glitter in Silver with Shellac Zillionaire in a palette then painted a coat on each nail as a tip with a nail art brush and cured for 120secs. On the ring finger I used some silver striping foil to make the lightening bolt and just stuck this to the tacky layer of the Blackpool. To finish it off, I added a coat of topcoat to each nail, cured for 120secs and then removed the residue with d-sperse. Voila!
What do you think? I love this alternative to a glitter fade.